Sunday, November 4, 2012

(evil) Skeletons - Quick Paint Tutorial

Followers of this blog my have noticed my involvement in a remote WFB3 game called "The Bridge over the River Chai". As it so happens, one of the participants of this game might summon enormous hordes of Skeletons, by using evil necromantic magic. To prepare myself for the such on occasion, I need to expand my current horde of 6 skeletons.

My understanding of an average skeleton is that they are an angry bunch of brain eating maniacs. I always thought John Blanche's vision of them to match this description quite accurately, as opposed to the bone polished, "G" rated versions of the late 90's. I like the macabre looking skeletons, covered in dirt and blood, seeking out vengeance to whoever comes in their path.

Arggh, we're bad to the bone!
Look, we're shiny happy skeletons!
See what I mean? It's all just a matter of taste of course, but to me this is how skeletons should look like. It's interesting to note that the picture above was taken from the WFB3 rule book, which is mirrored, so no, skeletons are not left handed.

Due to a limited time schedule I needed to paint quickly, and while at it, I thought to do a little quick paint tutorial, just for you...

Tuesday, October 23, 2012

Mold #74: Fieldstone Bridge(s): Part 2

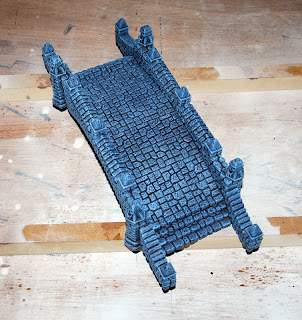
I finished painting the bridges. I've painted the bridges with the same painting technique as the hill panels, described in Modular Gaming Table: Part 12. This enforces the idea that the bridges are made of the same rock materials.

Below some pictures of the various dry-brush stages:

Base painted with Scorched Brown
Dry brushed with Shadow Grey
Dry brushed with Space Wolves Grey
Dry brushed with Fortress Grey
I did an extra dry-brush with "Off White", added various layers of watered down Vallejo washes of "Sepia Wash", "Umber Shade", "Fleshtone Shade", "Green Shade", gave it a satin varnish and finished it with a "Testors Dull Coat" varnish.


I'm planning to add some foliage to the bridge in a later stage. I'm in a bit of a hurry, because I needed to finish the bridges for our upcomming battle report "The Bridge over the River Chai".

Friday, October 5, 2012

Mold #74: Fieldstone Bridge(s): Part 1

After finishing the table I realised I needed bridges in order to cross the river sections. I didn't want to design and create them from scatch, but I also didn't want to buy pre-made scenery. Looking around on the internet I found the perfect source for my solution, Hirst Arts Fantasy Architecture Inc.

The website offers a great range of molds to create buildings of any shape and size.Without wasting time I quickly ordered, mold #74: Fieldstone Bridge.

When it arrived a week later I immediately set out to cast the materials needed for two large fieldstone bridges. The Hirst Arts website contains everything you need to know about this.

Below you can see the casting progress.

Close-up mold #74
Close-up mold #74 with plaster
Materials for one bridge
Glued and assembled
Sealed with Epoxy
I'm not sure whether sealing the plaster with Epoxy is proven practise, but it seems to work very well. The plaster is very fragile when left untouched. The Epoxy protects the fragile plaster, tightens the bonds between the various parts and the Epoxy is absorbed by the plaster without obscuring any details. So far, I haven't noticed any side effects.

You can also use the bridge materials to create other structures like walls. I've noticed that Thantsants from over at the Somewhere the Tea's is Getting Cold blog uses stone walls made out of same materials. Below a picture from his battle report Blood Bath at Orc's Drift - Encounter at Ashak Rise.

I'm definitely going to make these 
Now I still need to paint them...

Monday, October 1, 2012

Modular Gaming Table: Part 15

Before we start with the demonstration, I would like to show a modification I made to the table. The first post of the series, shows a method for stabilizing the legs with side bars. See picture below:


The above method has shortcomings. Not all of the bars are interchangeable, they're difficult to attach/detach and sometimes they simply fall out. This is why I replaced them with aluminium bars. Both ends of the aluminium bars have a canoe-clip attached to it. This allows them to be clicked in place, instead of hooked. This creates a solid connection with the table and offers a much sturdier solution.

A canoe-clip
Frame (large) and leg (small) connection bar
Inside and outside side bars
The connection bars for the legs have been shortened, otherwise they would interact with the canoe-clips. The shortened connection bars can only be used for the storage setup, but not for connecting frames. This poses no problem, because not all of the connection bars are used in a complete table setup.

Frame with shortened connection bar
Frame with leg
Leg with side bars for extra support and stability
Now, let's get on with the demonstration... What does the table look like when stored?

Two sets of 6 frames and panels in storage mode
Some might have noticed a slight difference between the backdrops above and the ones I've posted my previous post. I actually made them 5 cm shorter, because the photo was too high. I should have tried it out first on some piece of paper before plotting it.

I started out with the BIG one, using four legs in each corner and four legs in the middle. During the setup I noticed that the four legs in the middle disrupted the slight downcurve of the table. This caused the panels to not align properly. Removing the extra four legs in middle solved the problem. Although I could have used the extra legs on the sides, the table seemed to hold out well with only four legs in each corner.

Below you can see the configuration setup I've used and some pictures.

Config 4x3 x13:y13
All the panels without scenery
All the panels with scenery and some miniatures
Photo shoot at the river
Photo shoot at the hill
I really like the 3x2 setup. This is the setup I'm going to use most frequently. It requires one set of 6 panels and frames and can easily be taken along with you.
Config 3x2 x10:y35
Without scenery
With scenery
You think orcs can swim?
Just look at it. Ain't it a sight to see?
Well, this concludes it, the last post of the "Modular Gaming Table" series. It took me about one year to finish, and I'm glad and relieved I finally did. I didn't take count of the actual time I've put into the project. Probably way too much, of which most was spent in research and figuring out how to go on.

Doing large projects like these can be straining, especially when you're married with children. Planning everything upfront, keeping a tight schedule and dividing all the required tasks in units of one hour, allowed me to use the available time as efficiently as possible, keep myself motivated and most importantly letting the wife know of the progress.

I don't like to admit it, but I made mistakes, even despite all of my careful planning. Luckily for me, nothing so severe that couldn't be fixed. I guess it's the human factor we all have to live with. In the end I'm very happy with the results.

Finally, I would like to thank all my followers for their support and the kind comments they've left on the blog.

Whether orcs can swim or not, having made river panels I now realise units propably won't be able to cross without some properly made bridges. You've guessed it, I'll be making two bridges for my next project, so stay tuned...

Oh yeah, you might be seeing some more pictures of the table in a new battle report I'm planning with Gaj from over at the Warhammer for Adults blog. Progress on this will be posted on Gaj's blog.

Friday, August 31, 2012

Modular Gaming Table: Part 14

In my previous post, I've promised to demonstrate the table in all it's glory. While planning the various setups, I realised I was missing something.

When using the table for the purpose of photography, one needs a suitable backdrop to make a pleasing photograph. As the co-author of two remote gaming battle reports, I experimented with various methods. For the battle reports "It's fun to slay at the Wyemm Seeyay" and "The Shadow of Koles Lorr", I simply printed one out and glued it on a piece of cardboard. The cardbaord had a little footstand attached to it, allowing me to put it anywhere on the table wherever I needed it. Although it served its purpose, this method has shortcomings, for example: the limited size only allows close-up shots, corner shots are not possible and it lacks a tight fit, creating a space between the ground surface and the bottom of cardboard.

To make the table as complete as possible, I improved the above method somewhat by creating two backdrop panels. These panels use the same attachment principle as the borders, allowing me to attach them at the sides of a panel.


The plan
The panels are made out of Dibond. Dibond is a composite consisting of two sheets of .010" aluminum with a polyethylene core. It is intended for such applications as signage, exhibit/display as well as digital mounting. Available in 1/8" thickness. Lighter than than Aluminum and Plexiglas but also very durable and flexible.


3mm Dibond 
I bought a panoramic photograph on dreamstime, and plotted the photograph on the Dibond panels with a FUJIFILM Acuity Printer. I've got access to such a device at my work, but there are enough companies out there who offer this as a service. It costs around 60+ euro to print 120x30 cm.


The printer
The cutting of the placeholders for the male "Kugelschnaeppers" are done with a milling machine. Again, they have one of them at my work. I've made a video of this, because I think this is the kind of machine every wargamer would like to have in his man cave. Just listen to the sound of this thing:


The "Kugelschnaeppers" are glued in place with Epoxy. This seales the cut-outs and makes a solid connection.

After printing and cutting
Male "Kugelschnaepper" glued in place with Epoxy
Perfect fit
Corner setup
The concept seems to work, but while working on this, some other ideas on how to improve it formed in my mind. Also, I'm not completely sure about the scale of the backdrop, maybe I'll be creating some new panels in the future.

For now, these are the backdrop panels I'm going to use to make a proper demonstration of the table. To be continued...

Monday, August 13, 2012

Modular Gaming Table: Part 13

In "Modular Gaming Table: Part 2" I talked about the theory of putting a border around the table while keeping the modular aspect of the table intact. As I'm finished with the panels, It's now time to put the theory into practice.

I needed to attach the male "Kugelschnaepper" parts to the borders and make sure that all the borders and "Kugelschnaeppers" are aligned. I used one of the borders as a template to attach the female "Kugelschnaepper" parts to the panels. This would ensure that all the borders fit on all sides of the panels in the exact same way.
Finally, I gave the borders three layers of black paint, making them look extra cool and shiny.

To be honest, I thought the border idea wouldn't work and that the whole idea was a bit too ambitous, but in the end I'm glad I sticked with it. I'm quite amazed how easily and well the borders fit onto the panels. They require just the right amount of force for attachment and detachment, which is accompanied with a nice clicking sound, adding a feeling of sturdiness to the whole.

Of course we all know the border is utterly useless, and the amount of resources and money spend on them doesn't outwight the result, but still, being able to put a border around my table and seeing my wife's expression while she wonders the futility of it all, makes me smile anyways.

Aligning the borders
Close-up of alignment
Back-side border with male "Kugelschnaepper" parts in place
Front-side border painted black
Panel with female "Kugelschnaepper" parts in place
Panel without border
Panel with border
River end with border
Border corner
As promised, I'll demonstrate the whole table in the upcomming post, so stay tuned for some serious table action.