I
n "Modular Gaming Table: Part 2" I talked about the theory of putting a border around the table while keeping the modular aspect of the table intact. As I'm finished with the panels, It's now time to put the theory into practice.
I needed to attach the male "Kugelschnaepper" parts to the borders and make sure that all the borders and "Kugelschnaeppers" are aligned. I used one of the borders as a template to attach the female "
Kugelschnaepper" parts to the panels. This would ensure that all the borders fit on all sides of the panels in the exact same way.
Finally, I gave the borders three layers of black paint, making them look extra cool and shiny.
To be honest, I thought the border idea wouldn't work and that the whole idea was a bit too ambitous, but in the end I'm glad I sticked with it. I'm quite amazed how easily and well the borders fit onto the panels. They require just the right amount of force for attachment and detachment, which is accompanied with a nice clicking sound, adding a feeling of sturdiness to the whole.
Of course we all know the border is utterly useless, and the amount of resources and money spend on them doesn't outwight the result, but still, being able to put a border around my table and seeing my wife's expression while she wonders the futility of it all, makes me smile anyways.
 |
| Aligning the borders |
 |
| Close-up of alignment |
 |
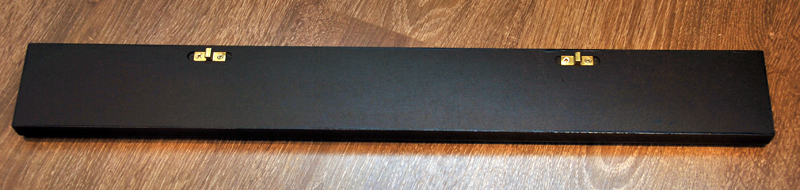
| Back-side border with male "Kugelschnaepper" parts in place |
 |
| Front-side border painted black |
 |
| Panel with female "Kugelschnaepper" parts in place |
 |
| Panel without border |
 |
| Panel with border |
 |
| River end with border |
 |
| Border corner |
As promised, I'll demonstrate the whole table in the upcomming post, so stay tuned for some serious table action.


Not useless at all! Finishing the edge looks really nice and damn professional. Genius!
ReplyDeleteWow! it just keep getting Cooler! amazing.
ReplyDeleteBlue