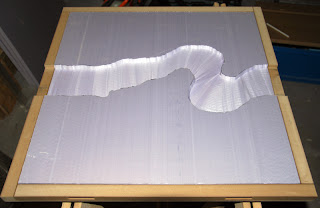
I also discovered that the table sinks a bit in the middle and actually helping press the panels together. I'm a bit worried how this will venture with the hills because these are 4 cm higher. There is always the possibility to put legs in the middle to push the table straight. I guess there's only one way to find out (crossed fingers).
I will now go through the extra steps required for the river panels. Assembling a river panel is almost identical as that of a normal panel except for the adjusted panel borders. Below a river panel which will hold a straight river section.
It's important that all river panels match at all connecting sides.
The foam I use has a thickness of 2 cm. This means if I cut a trench in the foam it's either going to be 2cm deep or somewhere in between if I cut it out on the surface, the latter being far from easy. In previous experiments I used a blowtorch to superficially cut out a trench in the foam. The problem with this method is that there's hardly any control. When the melted foam sets it hardens preventing you to cut any deeper. The hardened foam cannot be sanded or worked with, in any way.
On the other side having a trench of 2 cm means you will have to fill it completely with some kind of filling material to get the desired depth or use some advanced foam cutting techniques.
So, unless you have foam cutting tools like a Freehand Router, Hot Knife or even an Adjustable Sled Guide you will need to create a foam cutter that can cut through a 60x60 cm foam board in one go. In my case I've attached two electrical wires to the floor and ceiling with 15 cm of thin iron wire in between. Connecting the middle iron wire with two "D" batteries makes the wire hot enough to cut through foam. With this wonderful piece of engineering I was able to cut the river boards.
 |
| You do have to watch where you're walking |
 |
| Foam parts |
 |
| Foam parts glued within panel |
 |
| I could think of many uses for this; pizza anyone? |


You're a genius. I mean it. That's an incredible set-up.
ReplyDeletePerfectly done! Definitely worth a follow!
ReplyDeleteCheers,
Mojo
Thanks all, I just hope I won't screw it up when it comes down to the actual building of the scenery.
ReplyDeleteI have just discovered your blog, your modular table plan is absolutely fantastic, I love the devise for connecting the panels, I will follow with interest,
ReplyDeleteJohn