Three factors determine my ground surface needs:
- Modular terrain boards
- Modular terrain pieces
- Playable for large-scale wargames
The second factor requires a flat surface, at least on some areas. Unless the modular terrain pieces themselves have flexible bases, little rocks or an uneven ground surface could easily lift it up, letting them stick out.
The last factor confirms my need for a flat surface. Large units don't stand well on uneven ground. The scenery should of course look spectacular, but above all, playable.
Putting the above factors together I have decided to keep the surface flat. I will only put stones near some of the terrain features. The modular terrain pieces will allow me to introduce a variety of scenery without limiting the modularity and playability of the table.
Having said all of this, let's continue with the process of creating the surface.
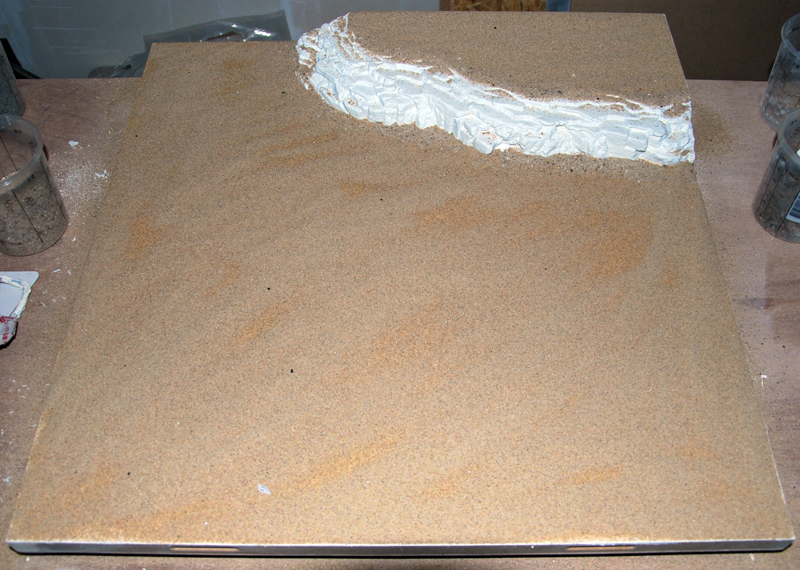
The surface is flat, that much we know already and because the panels are already flat, I don't have to worry about it. However, I do want to give the foam a protective layer and in the same time give the surface a natural looking texture. For this, I'll be using Foam Coat for protection and aquarium play sand for the texture.
In the process of figuring out a suitable texture, I created various test samples and while doing so, collected various types of stone materials along the way. Most of which turned out useless, but some made it through, namely: the aquarium play sand, "brekerszand" and "invoegsplit" (gravel). The last two mentioned are paving jointing materials. In total, these materials give me three types of textures: fine, medium and rough.
 |
| Fine |
 |
| Medium |
 |
| Rough |
 |
| They have exactly the same stones |

I applied the mixture with a large paint brush, then covered it completely with the aquarium play sand and pressed it into the mixture with a paint roller. Not too hard of course, but slightly rolling it over the sand.
 |
| Covered with the Foam Coat mixture |
 |
| Medium sand material near the edges |
 |
| Covered in fine sand material |
 |
| Looks playable, right? |
Do you seal you texture sand? I always mix a water thin PVA mix up and paint it on after the base is dry (usual give the base 2 days to dry). It makes the sand rock hard and resistant to crumble. Nice guide, I never find the time to take proper progress photos.
ReplyDeleteHi Robin, I useally do the same, but with the method described above it isn't necessary. The foam-coat mixture and paint seal the sand. Although I mentioned the use of a paint roller, it's better to leave it alone until dried.
Delete